

Early detection and mitigation of a leaking water tank are paramount in any event where tanks are used. Likewise, being able to locate such information on re-welding the water storage tank seal welding is vital to know the exact process for a successful repair, as well as the professional assistance that is required. Continuous inspection of your water tanks is the best way to ensure the longevity of water tanks and more, may avoid serious injury or damage.
When Is The Right Time to Seal Weld Your Water Tank Roof?
How do you know when it’s time for tank roof seal welding? Over time, steel water tanks are subject to corrosion. While it may be true that tank roof seal welds aren’t required for structural strength, what happens is that going without these welds results in rust bleeding from between the rafters and the roof plate, which leads to corrosion inside the tank and potential weakening of structural support.
Another main cause of corrosion inside water storage tanks is electrolysis. When the interior coating is damaged the steel is exposed to rust and electrolysis. Electrolysis can also cause corrosion on a tank’s floor from the bottom upwards. This can be controlled by preventing rainwater from seeping underneath a tank and by means of a cathodic protection system.
Steps to Re-Welding Water Tank
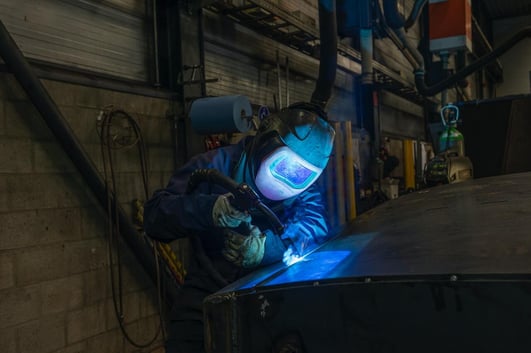
Step 1: Gather the equipment
The first step to water tank seal welding is to ensure that all of the correct equipment is gathered for use before starting the welding process. This equipment includes:
- Patch plates or other materials needed for repairs
- Personnel lift equipment to access the interior of the roof.
- PPE (gloves, safety glasses, face mask, welder’s helmet, etc.)
- Ventilation fans or other means of air supply
- Hand tools suitable for fitting and welding
- Shop vacuum
- Welding machine and accompanying equipment.
- Grinders and wire wheels
- Welding shielding gas (if applicable)
- Filler materials for welding processes selected
Step 2: Drain and dry the tank
All power and fluid input to the tank must be isolated, shut off, and locked out to prevent unexpected activation.
When draining and drying the tank, the following steps need to be followed:
- Ensure the tank is open to the atmosphere above the water level to prevent tank collapse.
- Drain the tank by opening the drain at the bottom end of the tank.
- Connect the hose and pipes to easily direct the water to the place it will be drained to.
- Ensure such places are safe from erosion.
- Clean the inside and external parts of the tank with a pressure washer, or domestically soap and water the area.
- Stay away from substances that include bleach, salt, or chloride ions.
Step 3: Removal of connections to the tank
Next, the removal of connections to the tank needs to take place, meaning that all the linked pipes, connection fittings, supplies, and plugs will be removed before any steps in the welding process commence.
For this removal process, gloves and safety equipment such as PPE (Personal Protective Equipment) should be used. The disconnection allows proper access to necessary parts of the tank without obstacles.
Step 4: Examine the tank for damaged areas
When examining the tank properly for the damage, it is important to determine the extent of the damage. These areas of damage include but are not limited to:
- For best results, the rafters and underside of the roof plates should be blast-cleaned to remove rust, scale, and debris and to reveal the magnitude of corrosion damage.
- For this reason, it is often necessary to cut an opening (called a doorsheet) in the shell to permit the entrance of personnel lift equipment and to assist in the removal of spent blast media.
- Wasting of material due to corrosion (weakened structural members, reduced plate thickness, pitting, paint failures).
- Cuts or punctures by high impacts.
- Damage by fire or hot objects.
- Pinholes from improper welding.
- Rust or degradation.
Step 5: Fix the damage
Once all the necessary steps have been completed, the time for repairs and seal welding arrives. To ensure that damaged areas are properly repaired, one must adhere to the following:
- Using fit gear, pull the roof plate down to all of the roof rafters leaving no gap and tack-weld.
- When the entire roof is fit, weld 3/16” fillet welds to both sides of the rafter-to-roof joints.
- Weld the underside of the roof plate lap joints.
- Cover any wasted plate areas of severe corrosion with patch plates.
- Isolated pitting can be filled with weld.
- Reinforce or replace any compromised structural members.
- When finished, there should be no places for water to seep in and cause corrosion.
Step 6: Recoat the tank
Seal welding in a water reservoir is done in order to arrest and prevent corrosion. It is therefore a major part of the project to repaint the tank to protect those areas after repair/seal welding. Once the interior of the tank is repaired and recoated, the doorsheet can be installed and tested per code. The doorsheet can then be coated to match the rest of the tank.
Tank Seal Welding
Water tank roof seal welding is a process that can be done to the roofs of older reservoirs to prevent further damage that comes as a condition of the outdated designs. Call or contact us today at T Bailey LLC to assess and address all your water tank repair needs. No matter how big or small, our well-experienced team is here for all tank-related tasks.